I absolutely love gift wrapping and all the fun accesories that go along with it. To me, the presentation of a gift should show as much love for the person as the gift itself. It’s an opportunity for a message – a moment to say “HEY YOU, you’re special to me” before the gift is even opened.
I’ve always loved the task of wrapping presents. So I am especially thrilled with this last in the series of blog hop posts for Eileen Hull‘s Sizzix Scoreboard dies. It’s a make-it-yourself bow aka “create-a-bow” – love it! Rather than get creative and try to make something new out of the bow shapes, I decided to keep this one simple and just enjoy the love of the gift bow.
The die itself cuts 3 different paper strip sizes and a couple button shapes but the possibilities for bow making is not limited to a single bow type. There’s a number of ways to bend the paper strips or alternate sizes to create a variety of bow styles. I’m especially excited about the idea of being able to make my own bows to coordinate however I like. I can make my own patterns or use favorite papers, even fabric. Mix and match colors instead of sticking with the standards at the store.
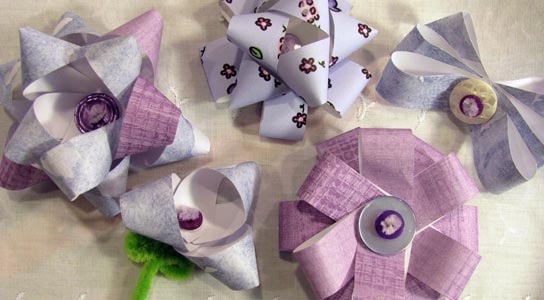
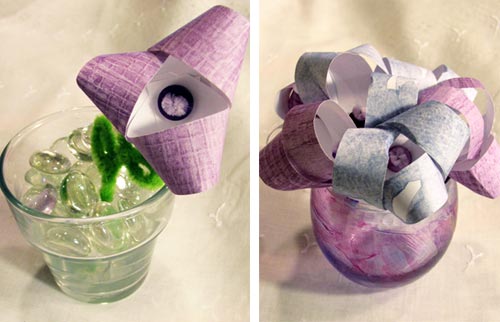
This is definitely my favorite Sizzix project, how can we not be happy making gift bows? Bows often remind me of flowers and today I was thinking a big ball of bows would make a fantastic hydrangea, or the three piece bow could be a pansie, thus the color selection for today’s project.
Here are a few of the bows I came up with, the center middle is my own pattern design as well.
And here are two cute little center piece or party decor ideas, both using small votive candle holders.
I chose to use pipecleaners and real buttons to put together my bows. You can use a variety of items to assemble these, including a standard brad or the paper button shape that comes within the die.
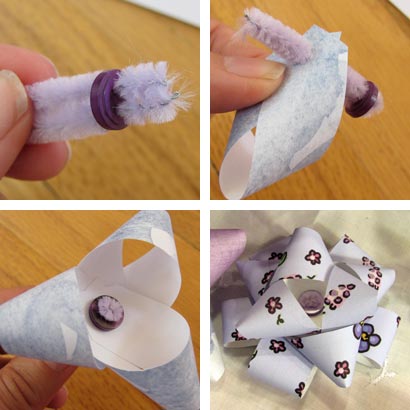
Here’s an example of how to make a standard bow:
- cut a small piece of pipecleaner, fold it in half and run through the holes in the button.
- use one paper strip and loop it so the corners overlap eachother, same side facing up.
- Push the pipecleaner through the holes in the paperstrip until the button is flush with the paper.
- repeat with additional paper strips until the bow is the size and look you want.
If you’d like to get a hold of the create-a-bow, visit the Sizzix shop online.
Check out more great make-your-own bow project ideas from the following websites:
Craftside-A behind-the-scenes peek at a crafty world
Modern Surrealist Marisa Pawelko says CHEERS to the Sizzix Blog Hop!


Jen, how cute are these? It is like a puzzle to see what else can be done with them. Thanks for all of your great projects throughout the hop! So glad you were along…
Love your bows! Very versatile die and you’ve made so many diffrent bows….
Jen, these are so pretty! I love the variations.
love the purple bow….they’re sweet!
How cute. Love the buttons
What a great idea! Thanks for showing us a variety of them.
These are so sweet. I love your colors and ideas for them!
So many variations!! Thank you for the details on how to assemble. Lovely bows.
I love all of the ideas with your bows!
Perfect for the “bow challenged”. It looks doable by all!
Jen love all the bows…
this is just too cute. i love them.
OMG you’re ridiculously crafty!!
Why don’t you live closer to me so I can outsource my gift wrapping to you? lol
they all would look so pretty on any package!
they all would look so pretty on any package!