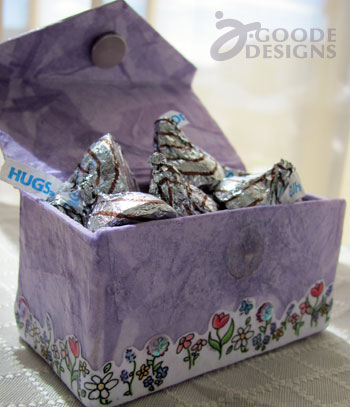
 Here’s another great project idea in conjunction with Eileen Hull‘s Sizzix ScoreBoards dies, the rectangle box. It’s a really nice basic shape with the added touch of a front flap to complete the box.
Beginning of a happy accident
I have to say with this project I had a complete fail of my own creation. I originally wanted to make a soft fabric covered box, but because I don’t actually own this die, I was using a single cut out version to attach my design to. So instead of attaching fabric and all before cutting the mat board (highly recommended) I was trying to use fuse-able fabric and then hot glue… unfortunately it was an utter fail! My box was entirely too thick with layers of fabric making it look bulky instead of cute. So I ripped everything off… which in turn created a complete mess of the pre-cut mat board.
Now What?? I didn’t want to throw in the towel. This particular project was designed with another designer in mind who is currently in the hospital. I wasn’t ok just giving up and not doing something, so I brainstormed and came up with the perfect solution…
When in doubt, decoupage!
If you use a tissue that isn’t coated, it works nicely as a decoupage component that makes really cool textures and patterns through overlapping, crinkling and folding. It also adds a nice hand made paper look to the piece.
You need:
- un-coated tissue paper
- mod podge
- small paint brush – a chiseled edge works best when you have corners to cover
- small bowl
- water
- First make a mixture of 2 parts mod podge to 1 part water. The consistency should be a little thicker milk.
- tear the tissue paper into pieces – 1″ – 3″ square or rectangle
- scrunch up the paper so you create wrinkles in it, this makes for some nice textures and ease of moving around while painting.
- paint a coat of the mod podge mix onto the surface you wish to cover.
- place tissue on coated surface and brush more mod podge over as you work the paper around – essentially you are painting a layer and then painting over the layer of paper.
- continue to add pieces of paper, overlapping as you’d like until the piece is covered as desired.
For this project I first created a layer of white tissue and let it set overnight. This helped to even out all the wacky bumps and tears in the mat board from removing the previous fabric design. Then I went back and added a few overlapping layers of a light lavender.
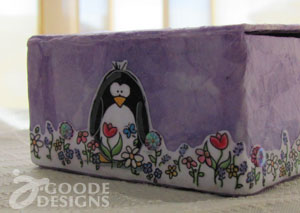
 Once the tissue layers dried, I took one of my own illustrations and adapted the layout to fit this box. I printed and cut it out and then decoupaged it on as well. I chose the penguin in a flower garden, that’s one of my personal favorites and I think it makes for a great bit of sunshine.
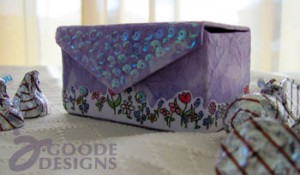
I then added some loose lavender sequins (with mod podge) to the front flap on the box s well as on select flower.
For a closure device, I used a magnet set by glueing one magnet on the back of the flap and then cutting out a hole in the main body of the box, fitting the second magnet inside and then concealing it with more tissue decoupage.
I finished off this little box by adding a small pile of Hershey’s Hugs candies to make the perfect get well gift…
A happy little box of sunshine filled with hugs.
 If you liked my project you might also like what other’s in this series have come up with.. please take a few minutes to check out their amazing creations! Love to hear your thoughts… leave a comment!
For more fun ideas, check out Sizzix craft products

View the other designer’s projects:
Ann Butler
Candice Windham
Carla Schauer
Cindi Bisson
Einat Kessler
Jen Goode
Julie McGuffee
Karen Burniston
Laura Bray
Lisa Rojas
Lorine Mason
Madeline Arendt
Melony Bradley
Michelle Cummings
Marisa Pawelko
Niki Meiners
Roxi Phillips
Sandy Laipply
Sparkle Studio
Veronica Goff

Love it Jen! Yes happy accident it is! Some (most) of my best work is done trying to fix stuff. Thanks for the great tut.
Adorable! Some of my best work are the projects I end up having to “fix” LOL! :0)
The magnet closure is a fantastic idea!
The magnet closure is a fantastic idea!
Jen this is adorable!
Jen this is adorable!
I’m sire she will love it!
I’m sire she will love it!
So cute, really like the penguin!!
this is so cute!
Looking at my piece the day after, I wish I had added a ribbon or some kind of color to the top edge of the box itself. It needs somethin’
Would have never have known there was a “mistake” made. That’s a darn good “save”. Great job!
so cute! thanks for introducing me to a new technique.
Oh dear – this is too cute!
Great save, Jen! Sometimes the screw-ups turn out for the best, and this is one of them. Love the colors. Love the illustration!
Jen… I feel your “pain.” My box was first covered with embossed metal tape! Your end result is very sweet… literally, very sweet!
Yummy project.