Why I Love to scrapbook

Over the years, manufacturers have come up with some amazing products for scrapbooking. From specialty cutters to stamps and varnishes, fabrics and embellishments, the scrapbook industry has grown leaps and bounds. Now with the internet at our fingertips, sharing techniques, tips and tricks is only a few clicks away. It amazes me the options we have to be creative… all in the name of love for our friends and family.

15 years ago when my first son was born, Creative Memories was just starting to really come into the scene and hardly any one I knew actually did any kind of scrapbooking at all. Back then the focus (at least for me) was just working on saving the memories with pictures in a photo album of some kind. Once I was introduced to the idea of creating a scrapbook I would try to add a page theme to add some extra interest, but nothing extraordinarily fancy. I wanted to remember the moment, but I didn’t do much in the way of journaling, so I tried to recreate the same feeling with the look of the pages I put together.

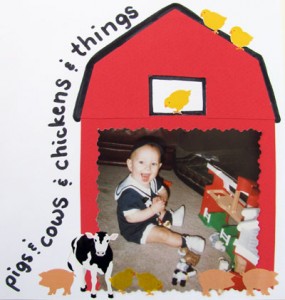
Scrapbook idea - barn

My son used to love playing with his farm animals, so to keep that memory, I created a little barn scene using a photo I had of him playing with his farm playset. In this example, I used solid colored paper, specialty scissors, a black marker and some farm animal stickers.

Scrapbooking is whatever you make it to be. It’s all about adding your own personality and experiences into your layouts. Some people create bright cheerful layouts full of color and excitement while others prefer the subtle colors of a vintage look creating more of a mood setting of romance or deep thought. The pages you create can have unlimited possibilities in how they look as well as the options you choose for supplies to use and how to use them. You can create something very complex, or very simple – it’s up to you!

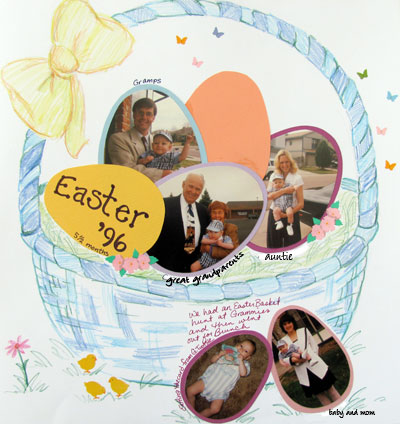
Easter Basket scrapbook layout

Before all of the fabulous options of dies and embossing and stamping techniques were available, I would add special interest by using my drawing skills and stickers (I’ve collected stickers since I was 9, it’s about time I used them for something, right?). In this example I used color pencils to draw a basket, stickers and craft paper to create a egg shapes to create a  cute Easter basket theme full of family memories (note the year… 1996!).

Scrapbooking is all about preserving memories. Whatever is important to you in capturing those moments, include those thoughts into your page layouts. Write notes, poems or jot down funny quirks about the day. Include colors that remind you of the event.

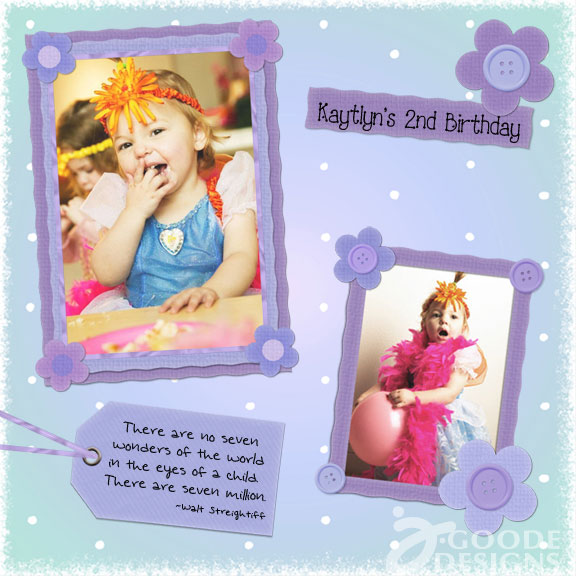
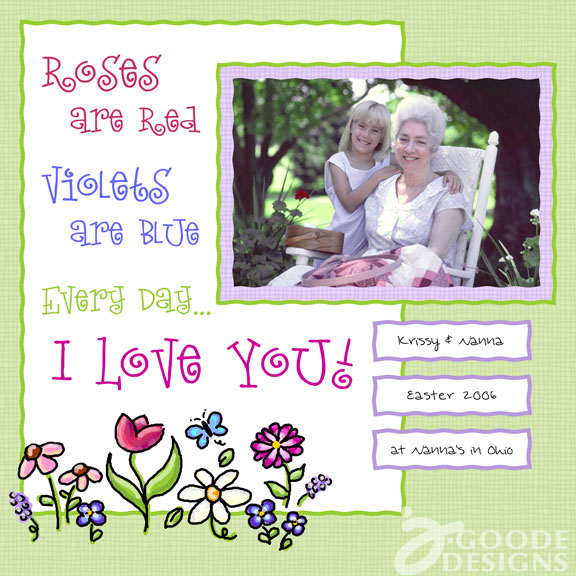
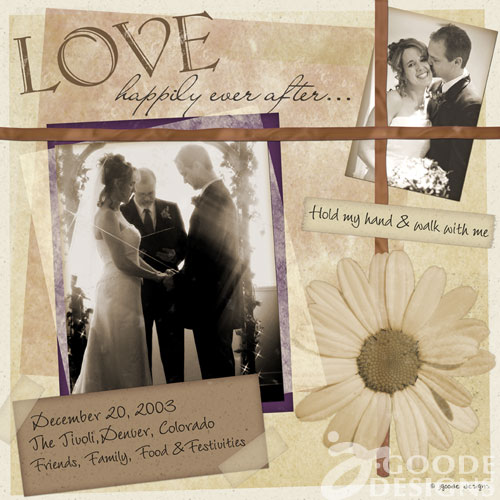
Here are 3 more layout examples I created using digital scrapbooking. There are a number of ways you can incorporate digital scrapbooking into your projects. I like to play with layout ideas on the computer but then recreate the same layout in actual tangible scrapbook supplies – real paper, stamps, stickers, glue and more. Later I will show you how to create these layouts with your own printer, paper and other supplies.

Scrapbooking layout

Pretty spring scrapbook layout

elegant vintage look wedding scrapbook layout

Scrapbooking to preserve memories to enjoy later as well as to pass on to future generations is a fantastically satisfying activity. There are no limits on creativity. The techniques and supplies available for you to choose from are endless. Regardless of your skill level or budget, you too can create beautiful pages that will keep your precious memories alive for years to come.

What do you like most about scrapbooking?
Getting ahead is usually more fuel for getting behind

Running around like a headless chickenThis week’s topic for Illustration Friday was “ahead”.  A number of images come to mind.. a chicken without a head, the behind of a any large smelly animal or a picture of a crocidile that my grandmother used to have on her bulletin board. Right above the crocidile there was a little note that said “the more I try to catch up, the more behind I get”.

That’s how I feel. It’s nearly Friday and I’m pretty sure I haven’t checked anything off the list because I can’t remember where I last saw the list. It must be somewhere between the hot glue gun and the mixing bowls but I have no idea which day I lost it. Maybe it’s partying with the missing socks, I don’t know.

What I’ve been up to:

  • Re-discovering my craft happiness with Eileen Hull’s blog hop – I even started organizing my craft space. It’s now the biggest room in the house (of course it is, it’s 1/4 of the unfinished basement).
  • Creating projects with my daughter for ProjectsforPreschooler.com, a new site I started last month as a way to share ideas of fun activities and crafts to do with the younger kids.
  • Trying to put together a portfolio for an upcoming art licensing show, SURTEX which I am attending next month in NYC. I’m hoping to find my way into the arms of loving manufacturers – or at least see the penguin in major retail outlets.
  • I’m making buttons to give to give away for World Penguin Day
  • And more buttons for a local event next month
  • Drawing more designs, creating some coloring pages and digital stamps and brainstorming new penguins
  • getting ready for my participation in an online e-course – I’ll be sharing tips about how to make money through print on-demand

and a whole slew of other things… but I’m happy to report that I’m finally getting back into focusing my efforts towards art rather than just internet marketing or programming. I’m sure I’ll jump back and forth as I always do, but the penguin needs me and I need him… so here I am enjoying the scents of the glue.

Make a get well gift – Little box of sunshine full of hugs

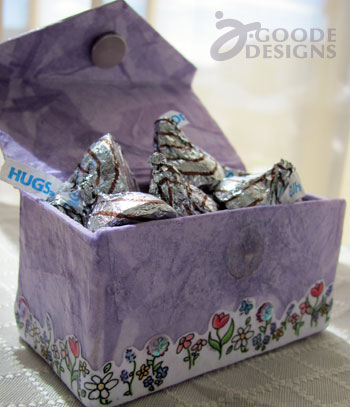
Box of Sunshine filled with hugs by JGoode - Sizzix Scoreboard rectangle boxHere’s another great project idea in conjunction with Eileen Hull‘s Sizzix ScoreBoards dies, the rectangle box. It’s a really nice basic shape with the added touch of a front flap to complete the box.

Beginning of a happy accident

I have to say with this project I had a complete fail of my own creation. I originally wanted to make a soft fabric covered box, but because I don’t actually own this die, I was using a single cut out version to attach my design to. So instead of attaching fabric and all before cutting the mat board (highly recommended) I was trying to use fuse-able fabric and then hot glue… unfortunately it was an utter fail! My box was entirely too thick with layers of fabric making it look bulky instead of cute. So I ripped everything off… which in turn created a complete mess of the pre-cut mat board.

Now What?? I didn’t want to throw in the towel. This particular project was designed with another designer in mind who is currently in the hospital. I wasn’t ok just giving up and not doing something, so I brainstormed and came up with the perfect solution…

When in doubt, decoupage!

If you use a tissue that isn’t coated, it works nicely as a decoupage component that makes really cool textures and patterns through overlapping, crinkling and folding. It also adds a nice hand made paper look to the piece.

You need:

  • un-coated tissue paper
  • mod podge
  • small paint brush – a chiseled edge works best when you have corners to cover
  • small bowl
  • water

Box of Sunshine filled with hugs by JGoode - Sizzix Scoreboard rectangle boxTo decoupage with tissue…

  1. First make a mixture of 2 parts mod podge to 1 part water. The consistency should be a little thicker milk.
  2. tear the tissue paper into pieces – 1″ – 3″ square or rectangle
  3. scrunch up the paper so you create wrinkles in it, this makes for some nice textures and ease of moving around while painting.
  4. paint a coat of the mod podge mix onto the surface you wish to cover.
  5. place tissue on coated surface and brush more mod podge over as you work the paper around – essentially you are painting a layer and then painting over the layer of paper.
  6. continue to add pieces of paper, overlapping as you’d like until the piece is covered as desired.

For this project I first created a layer of white tissue and let it set overnight. This helped to even out all the wacky bumps and tears in the mat board from removing the previous fabric design. Then I went back and added a few overlapping layers of a light lavender.

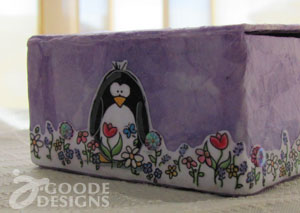
Box of Sunshine filled with hugs by JGoode - Sizzix Scoreboard rectangle boxOnce the tissue layers dried, I took one of my own illustrations and adapted the layout to fit this box. I printed and cut it out and then decoupaged it on as well. I chose the penguin in a flower garden, that’s one of my personal favorites and I think it makes for a great bit of sunshine.

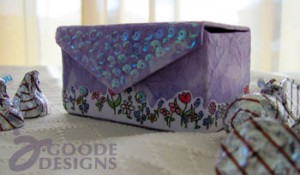
I then added some loose lavender sequins (with mod podge) to the front flap on the box s well as on select flower.

For a closure device, I used a magnet set by glueing one magnet on the back of the flap and then cutting out a hole in the main body of the box, fitting the second magnet inside and then concealing it with more tissue decoupage.

I finished off this little box by adding a small pile of Hershey’s Hugs candies to make the perfect get well gift…

A happy little box of sunshine filled with hugs.

If you liked my project you might also like what other’s in this series have come up with.. please take a few minutes to check out their amazing creations! Love to hear your thoughts… leave a comment!

For more fun ideas, check out Sizzix craft products

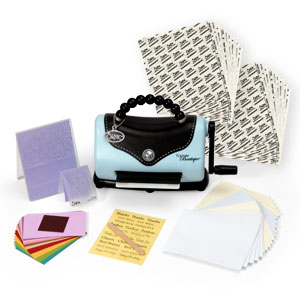
Get a Sizzix Texture Boutique Bonus Kit 25% off

Get craft with this Sizzix 50-Piece cardmaking kit featuring the trendy Texture Boutique Embossing Machine and a bonus gift of 20 FREE adhesive sheets. So fabulous and so fun!

Sizzix Texture Boutique Embossing Machine Bonus Kit

Sizzix Texture Boutique Embossing Machine Bonus Kit
with 20 FREE Adhesive Sheets.

Now 25% OFF. Use Coupon Code: TBBK25 Through Sizzix.com only
Coupon Valid April 24th-May 31st

Sizzix has empowered expression among creative-minded consumers for almost a decade. Innovations along the way have allowed for embossing, stamping and texturizing, as well as die-cutting everything from cardstock to fabric with revolutionary press-style and roller machines.

I love Sizzix products because they make it easy to create some complex effects without taking away from the hands on of crafting that I love so much.

For more Sizzix fun, check out the two projects I’ve made with Eileen Hull’s Scoreboard dies:

Scented tea cup flower vase and Princess purse party favors

Make your own pretty scented tea cup flower bouquet

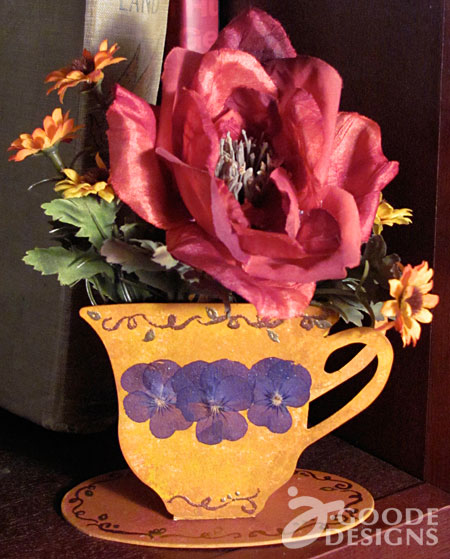
Here’s another fun project idea using a Sizzix Scoreboard die by Eileen Hull. This particular die is a tea cup and comes in 4 pieces: one tea cup shape, bottom/saucer, body (side and bottom wrap around) and a cute little tag. You’ll need to cut out 2 tea cup shapes to make the full piece.

Sizzix tea cup flower bouquet by JGoode Designs

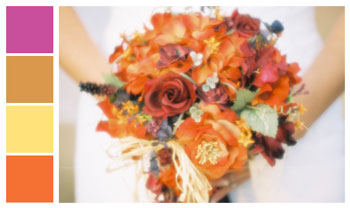
For my version of this project there was an additional color challenge suggested by Brenda Pinnick. She offered two different color themes and I chose the pretty gold and raspberry combination. Just so happens this was very similar to the color theme I had chosen for my wedding (eons ago) but because I never throw anything away, I still had some random pieces and parts from creating my bouquet and other wedding accessories. Perfect fit for me I say!

Sizzix tea cup - Brenda Pinnick color challage

On to the crafting fun part…

How to create a tea cup flower bouquet
with the Sizzix Tea Cup die by Eileen Hull:

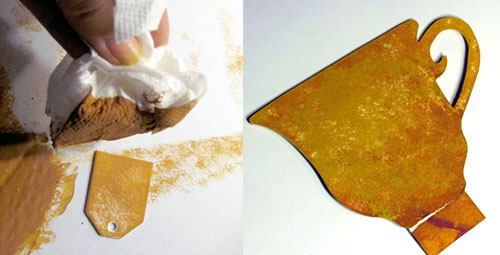
  1. Paint each of the individual pieces using a paper towel with Plaids craft plaint and a blotting technique. Paint in layers of a caramel color along with a mustard/gold yellow color to make the texture and color variation effect.
  2. Sizzix tea cup - blotting paint

  3. Using a hot glue gun assemble the pieces to create the cup – do not attach to the saucer yet.
  4. Sizzix tea cup - assembly

  5. Spot paint (blotting) any corners or edges that have been missed before assembly.
  6. Next hand paint a swirl design with embossing solution for use with embossing powder. Sprinkle on bronze and gold embossing powder and then used the heat gun to finish off the technique. Here’s a great tutorial for embossing tips and techniques.
  7. Using Mod Podge, decoupage 3 dried pansies (by Pressed Petals) to the front of the cup. Carefully apply a layer of Mod Podge on top of the pansies to create a thin protective coating. These flowers are extremely brittle, so make sure to not use so much glue as they will stick and pull with your brush.
  8. After the initial Mod Podge is dry, add an additional layer of Mod Podge to the entire cup and saucer using the same paper towel blotting technique as the painting process. This will create a subtle shine while adding a protective coat as well as a slight texture effect.
  9. Hot glue the cup to it’s flat saucer base.

To add a subtle scent and flowers to the tea cup gift:

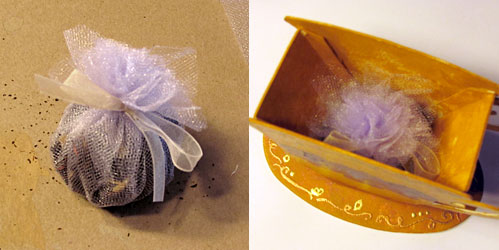
  1. Cut two pieces of tuelle fabric approximately 6″ – 8″ square (or use 2 pre-cut 10” Tulle Circles) layering each other so there is a double layer of fabric.
  2. Place approximately 1/4 c. loose tea in the center of the fabric, (I used American Tea Room‘s Broche tea – YUM!).
  3. Gather all sides and tie with a ribbon so there is a nice ball of tea.
  4. Sizzix tea cup - tea ball

  5. Fit the tea ball into the bottom of the tea cup.
  6. Cut fake flowers to desired length/height.
  7. Push flower stems into the tea ball in the cup to create desired flower arrangement.

Sizzix tea cup flower bouquet by JGoode Designs

Get Involved!

There is a group of us making our own variations of this project before the product actually launches – Check out all the other cool ideas created by other designers.

Sizzix Blog Hop

Other Participating designers:


Making bookmarks – JGoode style

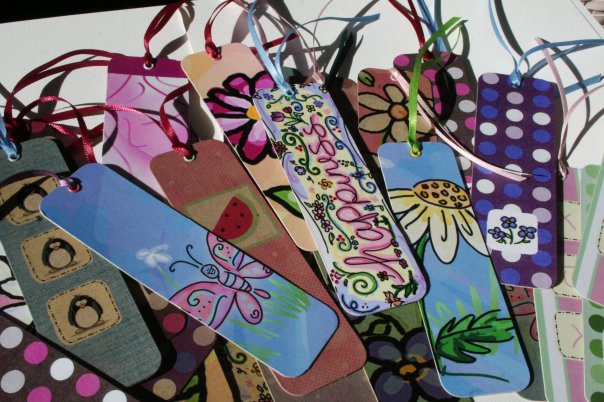
I’ve made bookmarks that feature my own art as yet another way to share the happiness that is a JGoode doodle. They’re nice and thick and really easy to put together, plus they can even be made from recycled materials.

Bookmarks by JGoode

Here’s how to make your own handmade bookmark:

You will need

  • an empty cereal box
  • spray adhesive, xyron adhesive or other adhesive
  • hole punch or crop-a-dile
  • 1/8″ ribbon cut to an 8″ length
  • scissors/paper cutter
  • spray varnish
  • designs to print or materials to hand draw your own designs

cereal box for bookmarks

Make it

The key is to create the art and add the back before you cut each bookmark down to size.

  1. Cut your cereal box into two sheets small enough to run through your printer, or hand draw/create your design directly onto one sheet of the cardboard.
  2. Using adhesive, add the other piece of cereal box cardboard to the back side so you now have one side with art and the other side is a nice clean brown (as opposed to the printed side of the cereal box). For this step I use an xyron to add adhesive to the entire back of the sheet of cardboard.
  3. Cut down to size using your cutter, cut your bookmarks from the sheet, approximately 1.5″ x 7″
  4. I chose to use a crop-a-dile corner chopper to round the corners of my bookmarks (optional)
  5. Spray with varnish and let dry – you could also use laminate or run through your xyron to add a laminate before adding the final touches of your bookmarks (optional)
  6. Using a hole punch of crop-a-dile, puch a hole centered about 1/4″ from the top of each bookmark
  7. Here I added an eyelet, but you can skip this step if you’d like (optional)
  8. Add the ribbon
  • fold ribbon in half
  • push through hole in bookmark
  • pull other end of ribbon up and through the loop you just put through the hole
  • pull tight

adding ribbon to hand made bookmark

If you are feeling really crafty, you could decoupage, collage or even stitch onto your bookmark cardboard instead of printing or coloring. The options are limitless!

Suggested tools:


Make your own princess party favors with Sizzix scoreboards

I had the opportunity to work with a soon-to-be released product by Eileen Hull as part of the Sizzix Scoreboards collection. This particular product, the  Scalloped Box die, is an adorable DIY project accessory that have a gazillion possibilities for fun creations. Read the “vote for me” comment below to learn more about how YOU could win a Sizzix die for yourself.

Princess purse by JGoode using Sizzix Scoreboards Scalloped Box Die

I played with a few ideas but with the help of my own little princess settled on the idea of a Princess purse party favor. This is a great project to put together with your own little princess as a Thank you for her party guests.

Princess party favor by JGoode using Sizzix Scoreboards Scalloped Box Die

Every item included in this pretty little party favor, with the exception of a cute mini 4-color pen, you can make yourself. Add your own special touch and get ready for some serious princess happiness, here’s how:

note: all printed graphics were designed by me and not currently available in stores.

Princess purse
Sizzix Scoreboards Scalloped Box die

I embellished the die cut matt board with pink craft paint, a princess pattern print out that I designed (free download), pink sparkle fabric, fancy white lace ribbon and a custom made sticker (see below). The purse handle is a wide organza ribbon attached to the purse sides using a crop-a-dile and white eyelets. The front flap of the purse closes with a small circle of velcro. The final touch is an organza bow on the front, two die cut flowers (included with the box die) and a little silver charm that says Thank You hanging from the side.

Tip: I used paint to cover various areas because I wanted the edges to match the finished piece. Scored and folded edges will be the color of your matt board edges otherwise.

Sizzix Scoreboards scalloped box die - princess purse design by JGoode

Inside the purse there are all kinds of fun princess treasures you can also make yourself.

Princess stickers
Printed on 1 1/2″ circle  Avery labels 8293

Princess puzzle
Printed on white card stock, adhered to a cereal box (brown side showing) for extra thickness – oh yes, recycled craft alert! Then I cut it out using the Sizzix puzzle die

Official Princess Card
Printed, cut and then laminated using lamination sheets

Princess notepad with cute mini pen
Construction paper cover with standard white copy paper cut to size – all stapled together at the top and then embellished with fancy white lace ribbon to hide the staple. A princess sticker added just for fun. The mini pen was found in the dollar isle of Micheal’s craft store.

Princess bracelet
Simple pink beads strung on elastic thread and finished off with a cute pink heart mini button.

I used hot glue and a double sided tape runner to put everything together. I love my glue gun!

lease vote for me - JGoodeWould love it if you would vote for me. If you like what I’ve done, I could really use your help… jump over to Eileen Hull’s blog about the Sizzix Scoreboards Scalloped Die and this blog hop and please vote for me! by leaving a comment telling her “I like Jen Goode’s Princess Purse”. If I get the most votes, I could win the actual die we used for this project. I could make these cute purses all day long… maybe even fill them with penguins instead of princess schwag!

You could win too… one commenter will be chosen at random (from any of the participating blogs) to win another fabulous prize (a Sizzix Die), so make sure to leave a comment telling her how much you like what I’ve done. Vote Here

(voting ends Monday, April 5th, 2010 at 6pm)


Recommended supplies some of the types of supplies I used


Sizzix ScoreBoard Blog Hop buttonHere are more great ideas to make with the Sizzix Scoreboards Scalloped box die:

Scalloped Box by Ann Butler

Scalloped Box by Bonnie Burns

First Aid Kit by Candice Windham Designs

Office Supply Creativity by Cindi Bisson

Craftside-A behind-the-scenes peek at a crafty world

Vintage inspired ATC box by Designs by Roxi

Scalloped Box meets Staples by Eileen Hull

Created from Paper by Jennifer Ellefson

Getting labeled Creatively by Just a Thought or Two

Popup gift card holder by Karen Burniston

Zen business card holder by Laura Bray

Scalloped box by Life Snippetts

Scalloped box by Niki Meiners

Scalloped box by Pink Lemonade

Needle case by Sandy Laipply

Everything Glitter by Sparkle’s Studio

Sunflower Note Card Scalloped Box from Stampin’ Queen

Scalloped box from Modern Surrealist

Pocket full of Dreams by Faerie Dust Dreams

Scalloped box by Brenda Pinnick

Beach inspired scalloped box by Carla Schauer Designs

Scalloped box by Julie McGuffee

Trendy little thank you gifts from Mel Designs