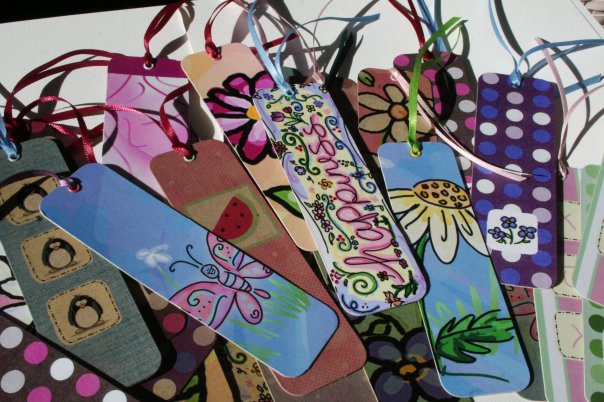
I’ve made bookmarks that feature my own art as yet another way to share the happiness that is a JGoode doodle. They’re nice and thick and really easy to put together, plus they can even be made from recycled materials.
Here’s how to make your own handmade bookmark:
You will need
- an empty cereal box
- spray adhesive, xyron adhesive or other adhesive
- hole punch or crop-a-dile
- 1/8″ ribbon cut to an 8″ length
- scissors/paper cutter
- spray varnish
- designs to print or materials to hand draw your own designs
Make it
The key is to create the art and add the back before you cut each bookmark down to size.
- Cut your cereal box into two sheets small enough to run through your printer, or hand draw/create your design directly onto one sheet of the cardboard.
- Using adhesive, add the other piece of cereal box cardboard to the back side so you now have one side with art and the other side is a nice clean brown (as opposed to the printed side of the cereal box). For this step I use an xyron to add adhesive to the entire back of the sheet of cardboard.
- Cut down to size using your cutter, cut your bookmarks from the sheet, approximately 1.5″ x 7″
- I chose to use a crop-a-dile corner chopper to round the corners of my bookmarks (optional)
- Spray with varnish and let dry – you could also use laminate or run through your xyron to add a laminate before adding the final touches of your bookmarks (optional)
- Using a hole punch of crop-a-dile, puch a hole centered about 1/4″ from the top of each bookmark
- Here I added an eyelet, but you can skip this step if you’d like (optional)
- Add the ribbon
- fold ribbon in half
- push through hole in bookmark
- pull other end of ribbon up and through the loop you just put through the hole
- pull tight
If you are feeling really crafty, you could decoupage, collage or even stitch onto your bookmark cardboard instead of printing or coloring. The options are limitless!
Suggested tools:


