Clay wall hanging flower pots

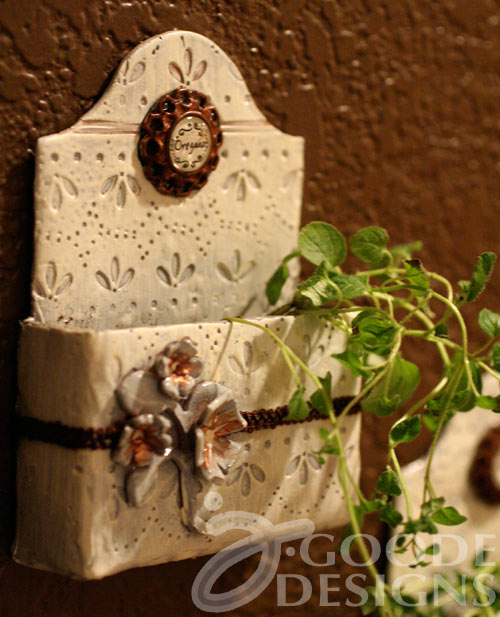
Clay wall hanging flower pot by Jen Goode

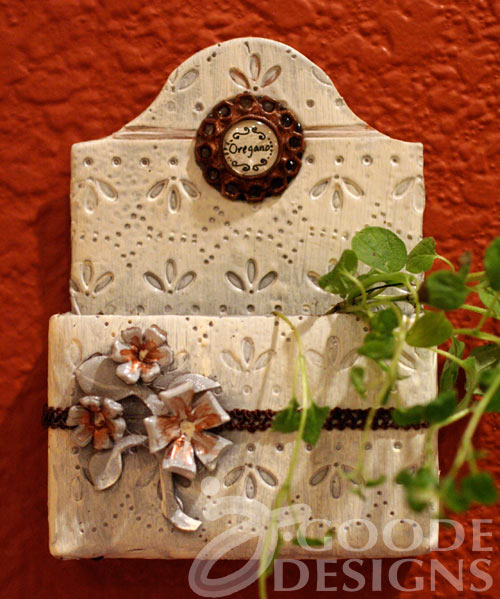
Here’s a new product challenge from Eileen Hull. This project features her new Caddy die by Sizzix embellished with custom shapes from Epiphany Crafts. I love this caddy shape and the countless uses for this particular die. When I first saw it I immediately thought flower pots. The shape is not too big, so it’s perfect for a little wall hanging herb garden right by the kitchen window!
Clay wall hanging flower pot by Jen Goode

I hadn’t used the Sizzix dies with clay, but a couple friends have been telling me the work well together so I thought this was the perfect project to try it. The clay would allow me to plant real plants in the flower pots. The clay also offers opportunities for adding some great texture and hand carved designs to any piece you make. I used a pattern design by Eileen as well to add some neat accents and texture to each pot. I then painted the pots with 2 types of spray paint to give it a ceramic look and then hand painted with a dry brush to finish the color.
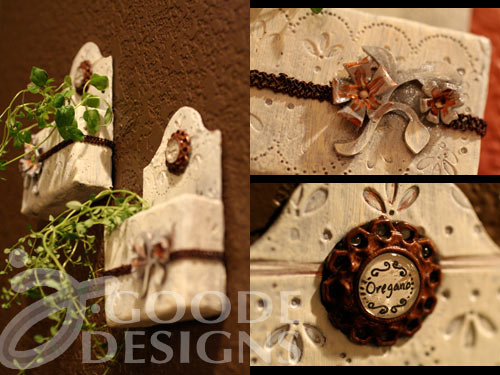
Details on clay wall hanging flower pot

For this challenge I also received a fantastic package of goodies from Epiphany Crafts which included a cool tool to make your own little custom shapes to add personalized embellishments to any piece you’d like. I decided to use the Round 14 shape tool and a couple of small metal flower style pendants to make name labels for each pot.

I’m not going to give you a step by step tutorial today, but I’ll give you a little run down…

Materials you need:

  • Clay, pasta machine, Sizzix Big Kick machine, paint (spray and brush on), parchment paper, scrap cardboard, ribbon or fabric trim, hot glue/gun and scissors
  • Epiphany Round 14 shape tool and coordinating bubble caps along with metal pendants and DecoArt no-prep metal paint
  • Eileen Hull’s Caddy die by Sizzix along with Lace Set embossing folders
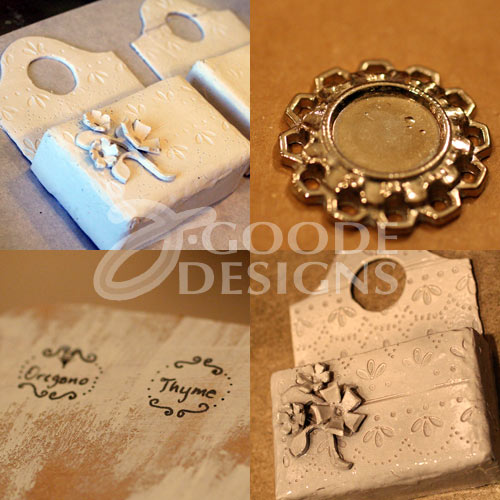
Some of the steps to make the clay wall hanging flower pot

Quick instruction over view to make these flower pots:

  1. Cut out and emboss Caddy pieces using clay
  2. Build Caddy and bake according to clay instructions
  3. Seal edges with hot glue
  4. Attach clay flower embellishments
  5. Paint as desired
  6. Make custom shape with Epiphany tools and attach as desired
  7. Plant herbs
  8. Hang and enjoy
Clay wall hanging flower pot by Jen Goode using Eileen Hull's Caddy die by Sizzix


Before you go…

Holiday greetings from all of us to you

It’s December 16th and I have yet to make my holiday cards let alone send them out. We’re making cookies for the neighbors tomorrow… but I haven’t gone shopping for even an egg. This year snuck up on me, yesterday was mid-July last I looked. So, for my last project in this year’s round of the Triple-Play Sizzix blog hop, I decided to make a holiday greeting I can share with everyone.

Happy Holidays from the Goodes

Happy Holiday Christmas Penguins by Jen Goode

In theory, this Treat bag topper designed by Eileen Hull for Sizzix would have goodies attached to it, however the brownies made last night were attacked by gremlins before midnight. (Yes, The Christmas Penguins are available to purchase on a variety products in my store).

I don’t have the actual die that cut out these shapes, instead of was sent pre-cut pieces to create this project with. However, it’s easy to embellish and decorate pre-cut/pre-made pieces… here’s how.

  1. Gather your pieces. Start off with the pre-cut pieces you’d like to use.
    Sizzix bag topper by Eileen Hull
  2. Pick your art. I chose to print out my own art and text. You can use clipart or go a bit further by stamping and drawing freehand.
  3. Cut and place art. I cut out the art, leaving a generous edge space and ran it through my Xyron for a nice smooth application of adhesive covering the entire piece evenly. I applied to the cut pieces and then trimmed off the excess paper.
  4. Color and accent. Next I colored the entire piece with Prismacolor markers to give more of a handmade feel.
  5. Add the details. I then drew various extras (white dots, loose circles, holly leaves etc.) with Marvy Uchida Puffy Velvet fabric markers, following the instructions to create a bit of a textured effect to my project. I Repeated the process around the edge of the sign piece as well as the white on Santa’s outfit.
  6. Final touches. Finally I applied DecoArt Twinkles glitter paint (crystal) to create the sparkle effect.
Decorated treat bag topper by Jen Goode

Have a Happy Holiday!

You can find the supplies I used at Sizzix, Mister Art, Joann and other retailers.

Check out what other designers have made with this fantastic die by Eileen Hull.

Supplies:

Sizzix.com-Tis the season for planning! 468x60 banner


Christmas ornaments make it home

Two pretty Christmas ornaments made from a little paper, a lot of color layers and really versatile Sizzix die designed by Brenda Pinnick. The die itself can be used in so many different ways, and since I’m continuing on in my holiday spirit mode, I thought ornaments would make a great addition to our Christmas tree.

When I was little, making Christmas ornaments was always a favorite thing to do. Now, things seem to get so busy we don’t stop to make much of anything just because anymore. Today I wanted to change that… we need a Christmas ornament making day!

I started out with a completely different vision, but let the project dictate where it wanted to go. I combined marker coloring, DecoArt metallic paint and embossing powder in various layers to create an aged, vintage feel to these paper ornaments.I finished off the ornament concept by using some Beadalon ColourCraft wire to twist into decorative hooks and hangers attached to the top of each ornament.

Christmas ornament
Christmas ornament by Jen Goode

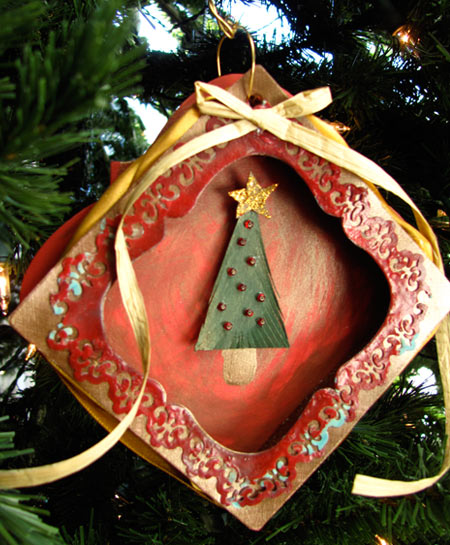
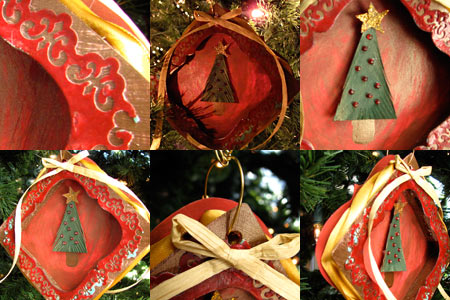
This design is layered using a painted packing foam and then covered in a gold satin ribbon. The star on the tree is covered in gold glitter paint I found at the Dollar tree. The decorative edging was created with a paper punch and the little red dots on the tree are red seed beads glued into place. I finished off the look with a brown raffia bow.  To get the aged look with the metallic paints, simply apply with a dry brush.

Christmas ornament

Christmas ornament with buttons
Christmas ornament with buttons by Jen Goode

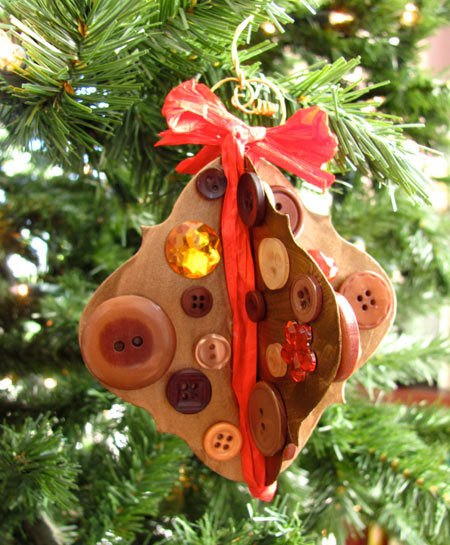
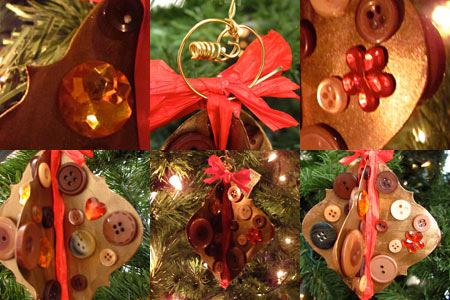
This piece is made with two interlocking pieces of cardstock which I painted with a bronze metallic paint. ( I LOVE these DecoArt Dazzling Metallics paint!). I have a whole jar of the fun brown buttons, and I keep seeing ornaments made with buttons so I thought now would be a good time to try the look. They are simply glued in place. I think it would be nice to add a hint of thread every now and then if I were to make this design again. The red ribbon in the center is raffia.

Button Christmas ornament

Make your own fabulous creation with one of the many terrific products from Sizzix!

Sizzix.com-Tis the season for planning! 468x60 banner

There are a ton of other great designes who have created amazing pieces with this same Sizzix die this week.. check them out by following the blog hop below:

Enter for a chance to receive a free gift card

JGoode Designs gift card for you

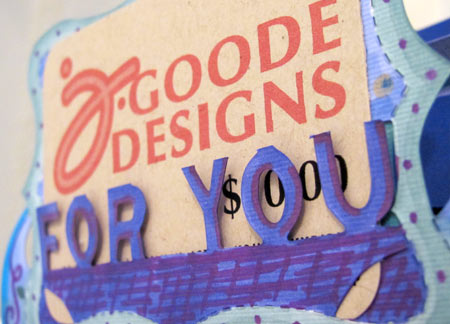
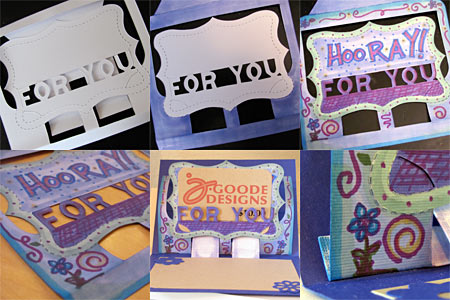
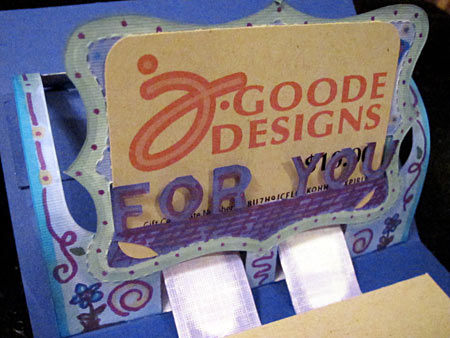
It’s finally December and holiday cheer is everywhere… in celebration of this festive season I thought I’d add a little twist to my Sizzix project this week. Karen Burniston has designed a fantastic pop-up 3-D gift card die to use with a Sizzix machine . I have embellished the card with my doodles. I’ve also added a $10 gift card, good towards the purchase of JGoode Design gifts, (yes, even the JGoode Penguin). See details below.

JGoode Designs gift card for you

Sizzix die by karen burniston and JGoode Designs gift card
Sizzix die design by karen burniston and JGoode Designs gift card

gift card and holder

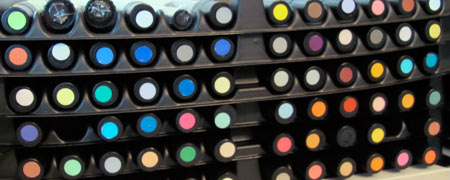
Today’s Sizzix project has been embellished with freehand drawing using Prismacolor art markers. I LOVE LOVE LOVE these markers! They blend really well, especially on smooth surfaces such as vellum or graphic paper. On the card stock used in this product the strokes created a nice watercolor kind of coloring appearance. I’ve used these markers since typography class in collage and finally got this set last year… I’ve been waiting to make something with them!

Prismacolor art markers
Prismacolor art markers set of 72 colors

ENTER TO RECEIVE A GIFT CARD!

A winner will be chosen at random Monday, December 6th  at 5pm EST (comment number chosen via Random.org.).

I will email the winner the gift certificate code so you can use it right away! I will also mail the card below (original JGoode art right there my friends!) along with the tangible gift card in place so you can give it as a gift if you’d like. So please make sure you use a valid email address when leaving a comment.

There are 4 Ways to Enter (Leave 1 SEPARATE Comment for EACH Entry). Each can be claimed daily.

  • 1 Entry – Mandatory to Enter – To enter the contest leave a comment on the Gift Card blog post at JGoode.com. Leave this as your FIRST comment. (If this is not done your entry will not count)
  • 1 Entry – Follow Jen Goode on Twitter
    (Leave a comment below with your Twitter name)
  • 1 Entry – Tweet about JGoode Designs… something like
    @jgoode is giving away a gift card today. Enter here https://jgoode.com/?p=3289
    (Leave a comment below with a link to your tweet. Here is how to get that link to your tweet)
  • 1 Entry – Join the JGoode Designs fan page on Facebook
    (Leave a comment below with your Facebook name)

I will not respond to any comments so that I can run the Random.org numbers correctly. Any trackbacks are unapproved while I select the random winner and then re-approved after. Only legitimate entries are counted. You have until 5pm EST on Monday, December 6th to enter.  The winner will be notified via e-mail and will have 48 hours to reply with a U.S. Mailing address so that I can send the winner their prize. Gift card will be mailed to U.S. addresses Only. Prize will be mailed by Friday, December 10th, 2010. Please only enter once, do not use multiple names to enter.

Once you’ve entered the contest, hop on to the next designer for this week’s Sizzix project – the creativity is amazing!

Making a snowman shadow box

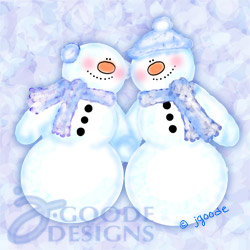
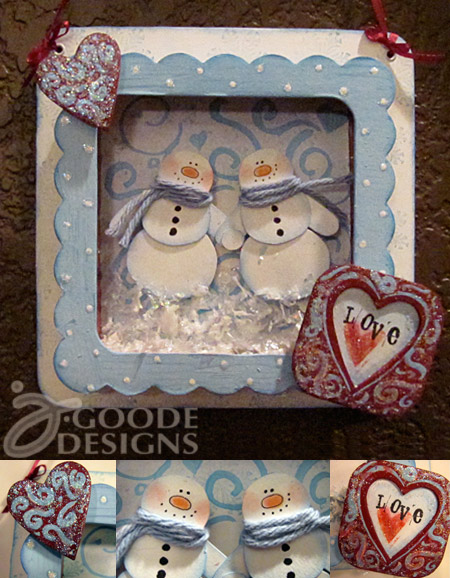
Happy snowmen by Jen GoodeHere’s a cute project I made as part of the Sizzix blog hop. With snowy weather all around and the holiday’s speeding up on me, I thought it would be a good idea to bring some happiness to the crazy cold.. warm things up a big with a grin or two and get ready for the festivities. I’ve been loving the light blue and deep red color trend I’ve seen floating around so I wanted to incorporate that look as well.

snowman love design by Jen Goode

This week I’m using Eileen Hull’s Sizzix ScoreBoards Pro Die – Frame & Frame Back w/Stand. There are a ton of different pieces with this particular die, however I chose to use only a few for this project. The inspiration for the scene is my own snowman illustration which I recreated using various paper shapes tinted with craft chalk.

Other supplies: Hot glue, Mod Podge, snowflake stamp, mini alpha-stamps, a crop-a-dile, yarn, ribbon, MARVY paint markers, DecoArt twinkles glitter paint and iridescent deco flakes.


You can also buy some cute snowmen gifts, t-shirts and more featuring the original snowmen design.

Check out the fabulous creations made by the 50+ other designers participating in this week’s blog hop.

Making pretty things with pretty pink flowers

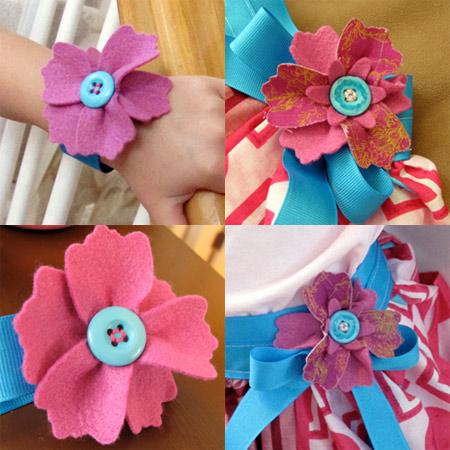
Flower bracelet

I gave myself a double challenge for this week’s Sizzix blog hop project. The featured item is a set of pretty little flowers, a Sizzix product design by Brenda Pinnick (Flower Beauty Bloom Sizzix Originals Die). Secondly, I’ve been on a mission to craft on a budget using items I’ve found at the dollar store or around the house. The result is a pretty little pink outfit with fancy flower embellishments that was quick to create and a fabulous bang for your buck.

Pretty pink flowers
Pretty pink flower shapes by Brenda Pinnick
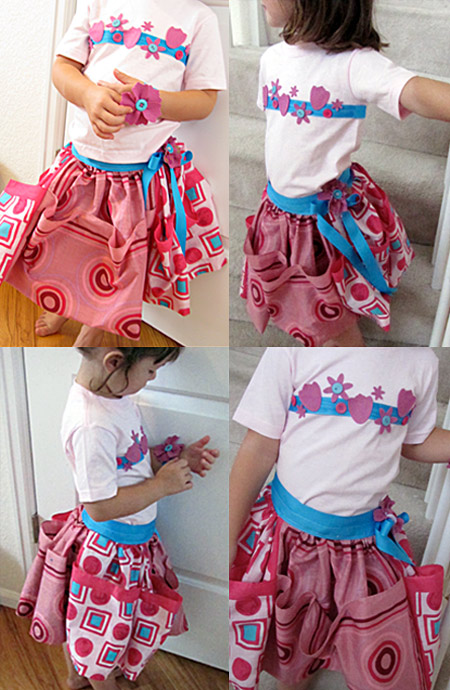
Pretty pink flower outfit
Pretty pink flower outfit by Jen Goode

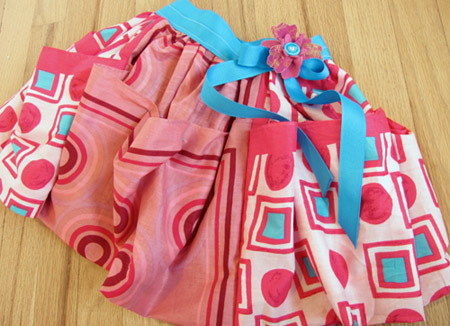
The skirt is made up of 4 miss-matched hankies, an aqua ribbon for the waist band and Brenda’s pretty flower pieces as the featured accent. The hankies came in a miss-matched pack of 2 for $1. I folded each hankie up 3/4,  and stitched together at the sides. No hemming or finishing edges required.

Handmade hankie skirt
Handmade hankie skirt by Jen Goode

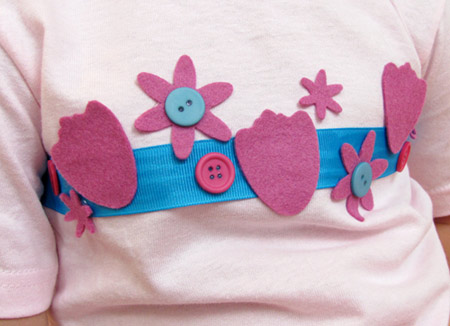
The shirt was purchased blank ($1) and then decorated with various flower pieces, aqua ribbon and buttons. They’re all glued on using fabric glue rather than stitched, making it a super fast project to make.

Cute decorated kids shirt
Cute decorated kids shirt by Jen Goode

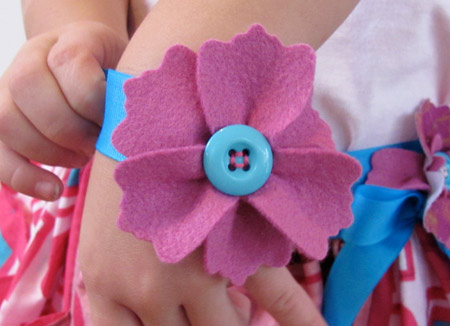
Finally, I had a few flower pieces left so I made a little bracelet. This would have also made a fantastic embellishment for some flip flops, cute little girl shoes or even various hair pretties (thanks Carla for that thought and Niki has some cute headbands that would match perfectly!).

Flower bracelet
Flower bracelet by Jen Goode

You can make this flower yourself using Brenda Pinnick’s Flower Beauty Bloom Sizzix Originals Die. Check more fabulous creations featuring Brenda’s flower design by clicking below:

Home Sweet Home

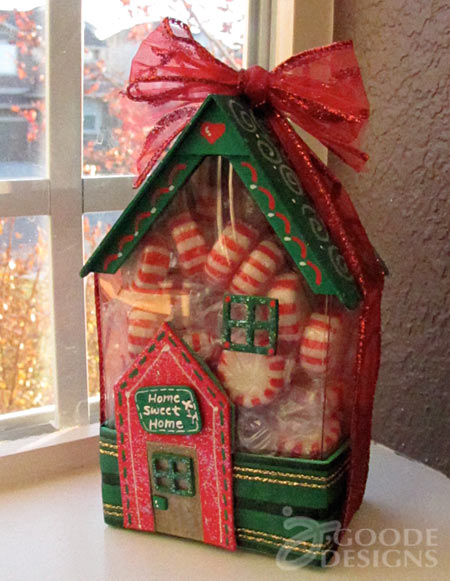
I am jumping on board with another blog hop with Sizzix and some amazing designers. This week’s project uses the Sizzix ScoreBoards Pro 3-D house die by Eileen Hull. It’s an adorable little house that comes complete with a wide array of accessories and add-ons. I decided to make a candy box, and since the holidays are so close, a Christmas theme is surely in order.Plus, no one hands out peppermints for Halloween, so this was a good excuse to go buy some.

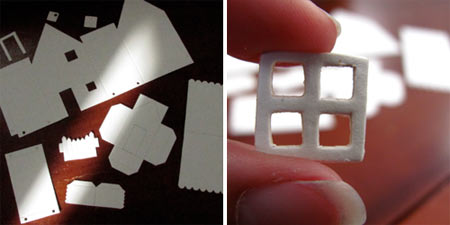
3-d sizzix house die by eileen hull

I have to say, my favorite part about this die are the tiny window frames. Ever since I was little and had a set of LEGOS with the little windows with shutters… I’ve been hooked on tiny windows.

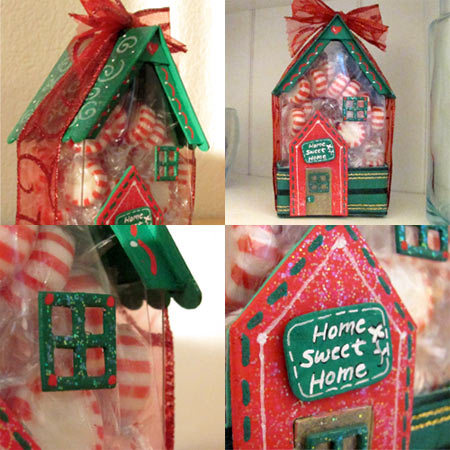
I chose to modify the mat board pieces and parts and replace the main house body with a clear plastic so you can see the candy inside the box. The plastic tends to bow a bit when the box is filled so I also added trim to the front and back of the roof to create a lid, holding the plastic box in place.

3D house die from Eileen Hull and Sizzix, decor by Jen Goode

Interesting tid-bit: I couldn’t find card stock thick sheets of plastic so I ended up purchasing a clear plastic Halloween paint can and took it apart for this project.  My original idea was to use enamel and hand paint some decor around the bottom of the box, however the paint can had Halloween decor printed on it, so I had to use the noggin to come up with design that covered the pre-printed plastic.

Supplies I used for this project:

Check out the 60+ other fabulous designer projects on this bloghop: